The DiverCity Lens program offers students a chance to consider and experiment with the formal elements of photography while exploring aspects of their identity and community. Through the medium of photography, participants reflect on their own identities, their diversity, and the diversity of the communities in which they live. By examining the work of photographer Zion Ozeri and others, taking and sharing their own photographs, examining the relationship between image and text, and ultimately preparing their work for exhibition, students are given opportunities to express their individuality while gaining a greater understanding of their place within the broader society. They are encouraged to recognize and respect differences while also acknowledging commonalities across individuals, communities, and cultures. Along the way, they develop their skills in photography, visual literacy, and textual analysis.
Photography is an art form—a creative medium through which we communicate ideas, emotions, and experiences. The choice of subject matter is only one aspect of photography. Just as important are the choices a photographer makes about what details to include, what to leave out, what angle to shoot from, what kind of light to use, how to arrange the elements of the picture, etc. Once students have a chance to explore these kinds of choices, they will be able to express themselves more creatively and thoughtfully. Although students probably have experience taking pictures, the process of editing and critiquing their photography may be new to them. It is a skill that will enable them to take their work in all areas to the next level.
Like written documents, photographs (and other visual media) can also be thought of as “texts” to be read. And as is the case with written texts, one must first identify the surface meaning of an image in order to get at the deeper understandings and interpretations. The ability to discern fact from interpretation, and the ability to draw inferences based on what is observable, are important skills that have relevance beyond the realm of the visual arts. Students may discover that the skills they have learned, in connection with looking at images (for example, developing interpretations based on evidence and recognizing different perspectives), can also be applied to reading written texts. Ultimately, seeing the connection between text and image can help illuminate both.
The program is divided into twelve 45-minute lessons**, each of which is outlined in greater detail in the pages that follow:
I. The Language of Photography
II. Speaking the Language
III. My Identity
IV. Multitudes
V. Exploring Community
VI. Community in Image and Text
VII. Community, Culture, and Diversity
VIII. My Portfolio: Photo Selection
IX. My Vision: Titles and Artist Statements
X. Photo Presentations: Sharing Our Work
XI-XII. Putting It All Together: Exhibiting Our Work
**Please note: Many of these lessons can be extended over 2 or even 3 sessions, depending on how much time you want or need to spend on critique and discussion of student work. We recommend the more time you can spend, the better.
Some of the lessons also include suggested extension activities if you are looking for further learning opportunities.
Through their participation in the DiverCity Lens program students will:
General skills
Interpersonal skills
Arts skills
Intrapersonal skills
The DiverCity Lens program will help students achieve the following visual arts benchmarks:
Art Making
In a 3-year major art sequence students master various materials and techniques to develop a portfolio that reflects a personal style and awareness of the power of art to illuminate, inform, and influence opinion
Developing Art Literacy
Students hone observation skills and discuss works of art; develop visual arts vocabulary to describe art making, the tools and techniques used to produce art, and the elements and principles of design; read and write about art to reinforce literacy skills; interpret artwork by providing evidence to support assertions; and reflect on the process of making art.
Making Connections Through Visual Arts
Students recognize the societal, cultural, and historical significance of art; connect the visual arts to other disciplines; and apply the skills and knowledge learned in visual arts to interpreting the world.
Community and Cultural Resources
By working with a variety of school staff, students access primary resources in the community, the borough, and the city to extend their learning beyond the classroom.
Photography
Student photography is fundamental to the DiverCity Lens program. Students will be expected to take pictures for homework, as well as write titles and captions for their work. Most of the lessons begin with a sharing session, during which some of the students will show their work, explain it, and invite comments and critiques from the teacher and fellow students. These critiques are crucial to the process, and we encourage you to spend as much time as you can nurturing student learning through this type of work.
Taking and sharing photographs will help students gain greater familiarity with the photographic arts, improve their “eye” for taking pictures, and develop a better sense of what makes a good picture. The students’ own work will also, in essence, become primary texts for their exploration of diversity, as well as the portfolio from which students will choose works for exhibition. So it is vital that students take pictures throughout the course and send or bring them in for sharing.
Students will, therefore, need access to cameras or camera phones throughout the course of the program. Although we do not require students to use a particular type of camera, we strongly recommend that they use digital cameras. This will make it easier to edit and share images. Some schools have provided digital cameras for students to use; others require students to bring cameras from home. But, the truth is, most of your students probably already have what they need in their pockets right now. Smartphone cameras have improved so much in recent years that most offer sufficient quality and flexibility for your students’ needs.
Technology
You will also need the capacity to share photographs in the classroom (those included in the curriculum, as well as those taken by your students). We strongly recommend you secure access to a computer and LCD projector, or a smartboard, for use during the duration of the course. Students can email or text you photographs they’ve taken for homework; you can then upload the pictures to your computer and project them for the class to see and discuss. If possible, you may also want to have some laptops available for students to share work with each other when working in small groups.
Before students begin taking pictures, remind them to use the highest resolution and file size possible. No specific resolution is required, but any photographs that the students eventually select for the exhibit will need to be of high enough resolution that they can be printed in large format without becoming pixelated. Students need to be especially careful when snapping pictures that are digitally zoomed-in or taken in low light, as that can decrease the resolution. Also, make sure files don’t become compressed; when students send you images they should make sure to send the full, original files.
We also encourage you to make use of free online digital tools for collaborating and sharing student work, such as padlet.com (http://jn.padlet.com/). A padlet is like a shared online pad or canvas to which members of a group can easily post photos, notes, videos, or documents. It’s simple and secure, and a class padlet can be a great way for students to share their photographs with you and with the rest of the group. You might also ask each student to keep their own photos on a personal padlet as a way to organize and collect their own work throughout the course. A shared closed Facebook group is another easy way to share and organize photos among the class.
Exhibiting Student Work
It is important that students have an opportunity not only to share their work in progress but also to present their finished work. This empowers and enables them not only to feel pride in their accomplishments but also to reflect on their work and understand how it fits into a larger context. We therefore recommend you conclude your DiverCity Lens program with an exhibition of your students’ work—or a virtual exhibition, if budget or space don’t allow for a physical display.
Before you begin teaching the course, try to find a space in your school or elsewhere in the community that can be dedicated expressly to a student exhibition. It should be a location with good lighting and high visibility. At the conclusion of the course, you will need to collect from each student the photographs he or she has chosen to display, information for the photograph labels (title, photographer, date, location), and the student’s artist statement. See “Mounting an Exhibition” at the end of this guide for some practical suggestions on creating a display of student work. We encourage you to enlist the help of students, parents, and/or other teachers in the process of putting together your exhibition.
If you are not able to create a physical exhibition, there are other ways to present your students’ work when the time comes. For example, you can create a digital slideshow of your students’ photographs to show to parents, other classes, or members of the school community. Your virtual exhibition could be put on display in the school or uploaded to the school’s website. It has also become increasingly easy and inexpensive to create professional-looking photo books using online tools. You can design them yourself and incorporate your students’ photos and texts into the layout. Snapfish.com and shutterfly.com are two popular sites that offer this service.
Adapting the Materials
We hope you will make the curriculum your own, and we encourage you to work with the materials in whatever ways are most comfortable for you.
You can follow the lesson plans as written or use them as a starting point from which to craft your own program. You may choose to divide one lesson into two or more sessions. You might choose to add other photographs or use the photographs and other resources in this guide in completely new ways. We only ask that you share your ideas with us so they can benefit all the teachers who are using the curriculum. We also encourage you to reach out to other educators you may know who are using the curriculum in your school or city to share ideas and suggestions.
Student Learning Assessment
The lessons outlined in this curriculum guide incorporate a variety of student activities, including small-group discussions, research assignments, observation exercises, creative responses, and student reflection. We encourage you to use these assignments as the basis for evaluating student learning as appropriate.
You may also want to have students keep a journal of their experiences. Journaling creates a space for students to reflect on their own experiences and learning. You can periodically collect the journals, read the students’ comments, and respond to them, in order to evaluate student learning and establish a direct dialogue with them about their work.
You might, for example, ask students to respond to a couple of open-ended questions or prompts at the end of each session or for homework. For example:
Supporting Materials
Most lessons refer to a related Lesson Supplement that’s included with the curriculum and contains any worksheets, photographs, and other resources you will need to teach that lesson. You should also feel free to mine the collection of photographs by Zion Ozeri that are included separately as well. Ozeri’s photographs of the global Jewish community, as well as other communities around the world, can serve as the basis for numerous discussions, reflections, and activities, relating both to the art of photography and the exploration of culture and identity.
We also encourage you to make use of the human resources available to you in your community. There may be parents or others in your school community who are professional or serious amateur photographers. You can call on these resources to share their work and ideas with students, teach photographic techniques and skills, or help mount a student exhibition.
Finally, we also recommend that teachers who are using this curriculum acquire a copy of The Little Book of Contemplative Photography: Seeing With Wonder, Respect, and Humility by Howard Zehr. This small, inexpensive volume provides numerous tips and activities to help aspiring photographers look closer and think more deeply about their work. While the book is not required, we believe teachers and students can both benefit enormously from its valuable insights and user-friendly exercises. You’ll find suggestions throughout this guide of possible ways to incorporate the text into your teaching.
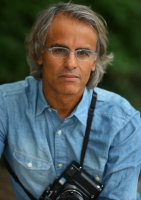
Z I o n O z e r i
Born in Israel to Immigrants from Yemen and currently living in the USA and Israel, Zion Ozeri is one of the world’s leading photographers exploring the Jewish experience. Raised in Israel during a period of mass immigration, he interacted with many diverse cultures. This unique background gives him a cross-culture perspective that suffuses his work.
He graduated from the Fashion Institute of Technology, as well as Pratt Institute, both in New York City.
His photographs appeared in The New York Times, Newsweek, The Jerusalem Report, Moment, the Middle East Insight, The Forward, LA Jewish Journal, The Economist, Ha’aretz, and many other publications. His work has been exhibited in the Israel Museum in Jerusalem, ANU, the Museum of The Jewish People in Tel Aviv, (formerly Beit Hatfutsot), The Spertus Museum in Chicago, The Museum of Jewish Heritage in New York, Centro Cultural Recoleta in Buenos Aires, The 92nd Street Y in New York, the Skirball Museum in Los Angeles, Berlin Jewish museum, Columbia University in NYC, and many other museums & galleries.
Ozeri published a few books in, including The Jewish World Family Haggadah, (Simon & Schuster, 2005), a coffee table book, The Jews of Yemen, The Last Generation, (Keter, Jerusalem, 2005, and a new edition by Gefen, 2024), and Pictures Tell: A Passover Haggadah, (Gefen Publishing, 2022). Ozeri won a Simon Rockower Award for Excellence in Jewish Journalism in 2004. He is the recipient of the Covenant Foundation award for 2013. He founded The Jewish Lens curriculum & project in 2004, and. In addition, Ozeri is the founder/creative director of the DiverCity Lens, a curriculum and program, implemented since 2012, in NYC public schools.
His lectures at Columbia University, led to a 2023-24 exhibition, “Jewish Identity, Jewish Diversity”, at Columbia University, and CUNY Hostos. It is scheduled to travel this fall to UCLA. Another exhibition, The Jews of Yemen, The Last Generation was exhibited last year at ANU, the museum of the Jewish People in Tel Aviv.
A new curricular lesson plans, Picturing Israel: History, Heritage and Homeland, was introduced to students in North America in the Fall of 2025.
www.ZionOzeri.com | www.JewishLens.org | www.DiverCityLens.org