Model & Consent Release forms, Glossary, Mounting an exhibition, Photography Resources
Model Release Form
PDF

Sample Consent & Release Form
PDF
Glossary
Below are some terms that students should know or learn over the course of the curriculum. Feel free to photocopy this glossary for students.
| Candid: | In photography, a photograph in which the subjects are not posed. |
| Community: | A group of people linked by common characteristics and/or mutual interests. |
| Composition: | In photography, the arrangement of figures, objects, and other elements in a photograph. |
| Culture: | The set of beliefs, values, traditions, and practices shared and transmitted by a particular racial, religious, national, geographic, or social group. |
| Curator: | A person whose job is to care for museum collections or organize museum exhibitions. |
| Framing: | In photography, what is captured within the borders of a picture, and how forms are situated in relation to those borders. |
| Identity: | The distinguishing characteristics of an individual, or the way one sees oneself. |
| Inference: | A conclusion based on evidence. |
| Objective: | Based on fact; unbiased; that is, not based on feelings or opinions. |
| Observation: | The act of looking carefully, or something that’s discovered through careful looking. |
| Point of view: | In photography, the placement of the camera in relation to the subject of a picture. |
| Portrait: | An image—such as a photograph, drawing, or painting—that depicts a specific person. |
| Scale: | In photography, the relative size of the different elements in a photograph. |
| Staged: | In photography, a photograph in which the whole scene is set up or constructed by the photographer, like a movie set. |
| Subjective: | Based on an individual’s opinions, attitudes, or beliefs. |
| Values: | The ideals, ethics, principles, or beliefs that guide people’s behavior in a culture or society. |
Mounting an Exhibition
Creating an exhibition of student work can seem like a daunting task, but it doesn’t have to be overwhelming. Below are a few suggestions to get you started.
Exhibit Layout:
Your exhibition will probably consist mainly of exhibition text and the photographs themselves. Exhibition text might include an exhibition title and introductory text; photo captions listing the title, photographer, date, and location for each picture; artist statements; and accompanying texts chosen by the students. For example, one wall of your exhibition couldlook something like this:

Hanging Photos:
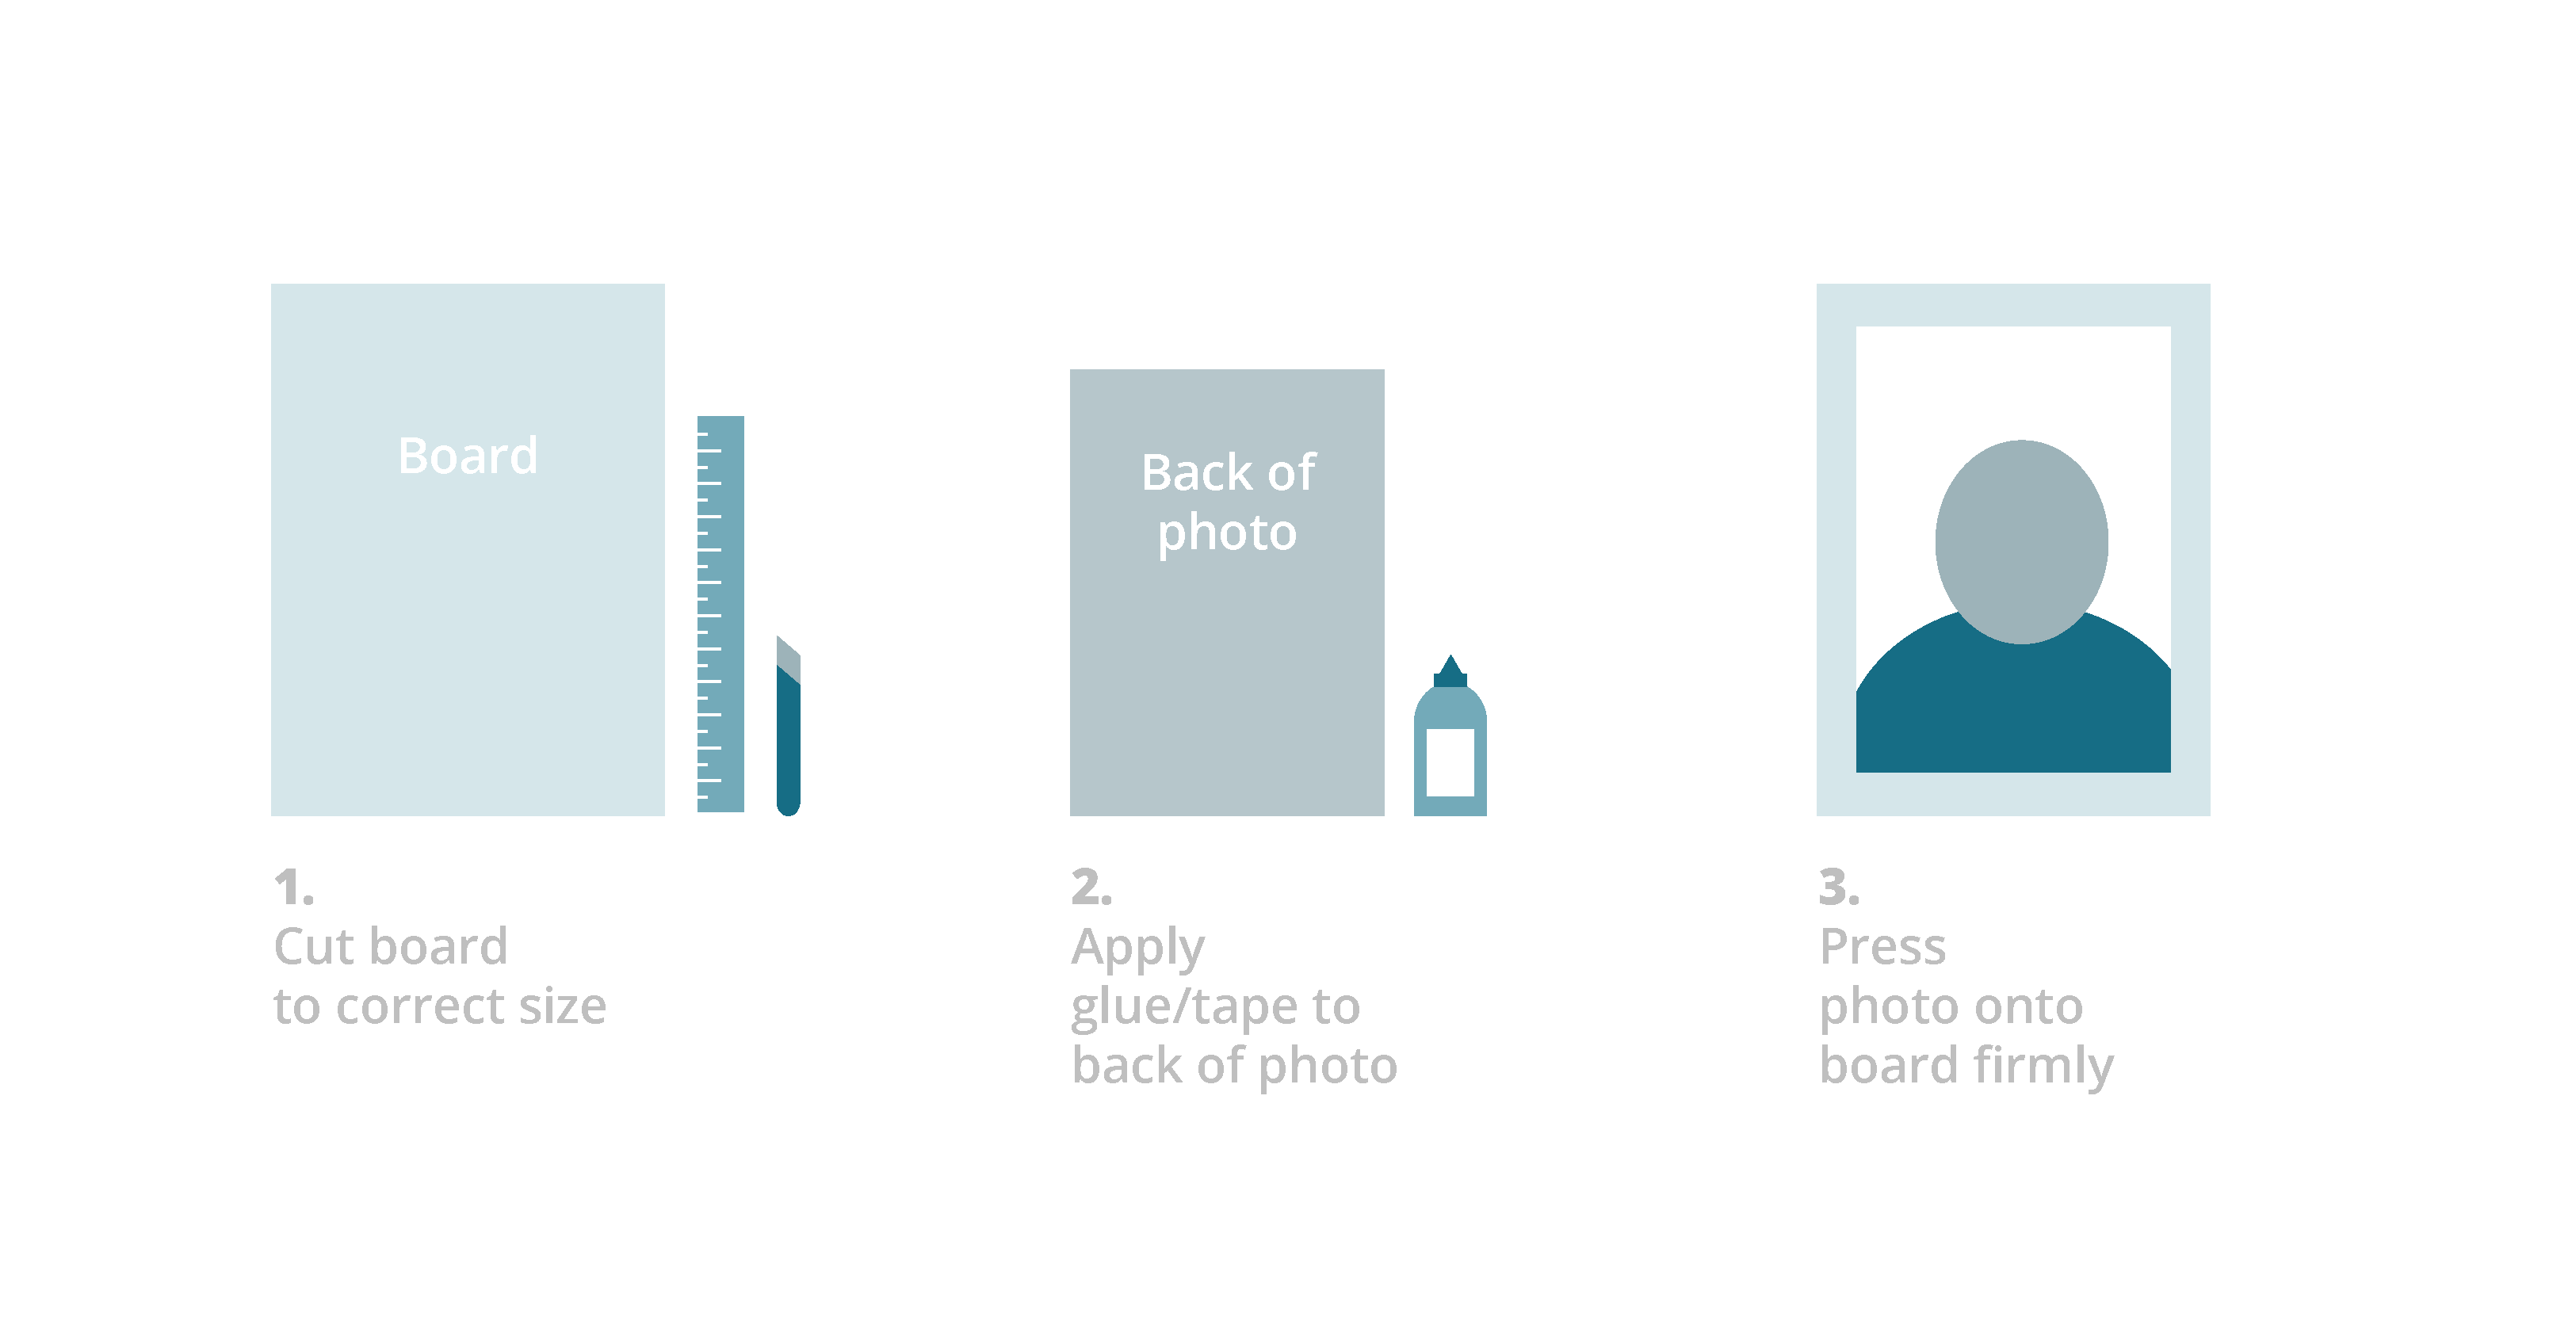
There are many ways to hang photos, depending on your time and resources. Photographs can be “framed” by mounting them on mat board (a sturdy board that comes in a variety of colors). You can also use Foam core (which consists of a thin layer of foam sandwiched between two sturdier boards). Both mat board and Foam core are available from any craft store or catalogue. Just cut the board into an appropriate sized rectangle (with a mat knife or exacto knife) so that the photograph will fit comfortably on it with a margin all the way around. Then attach the back of the photo to the board using double-sided tape, spray mount (an easy-to-use spray-on adhesive), or a glue stick. (See diagram below.) Oak tag or construction paper can be used instead of mat board or Foam core, although the result will probably not be as sturdy and durable.
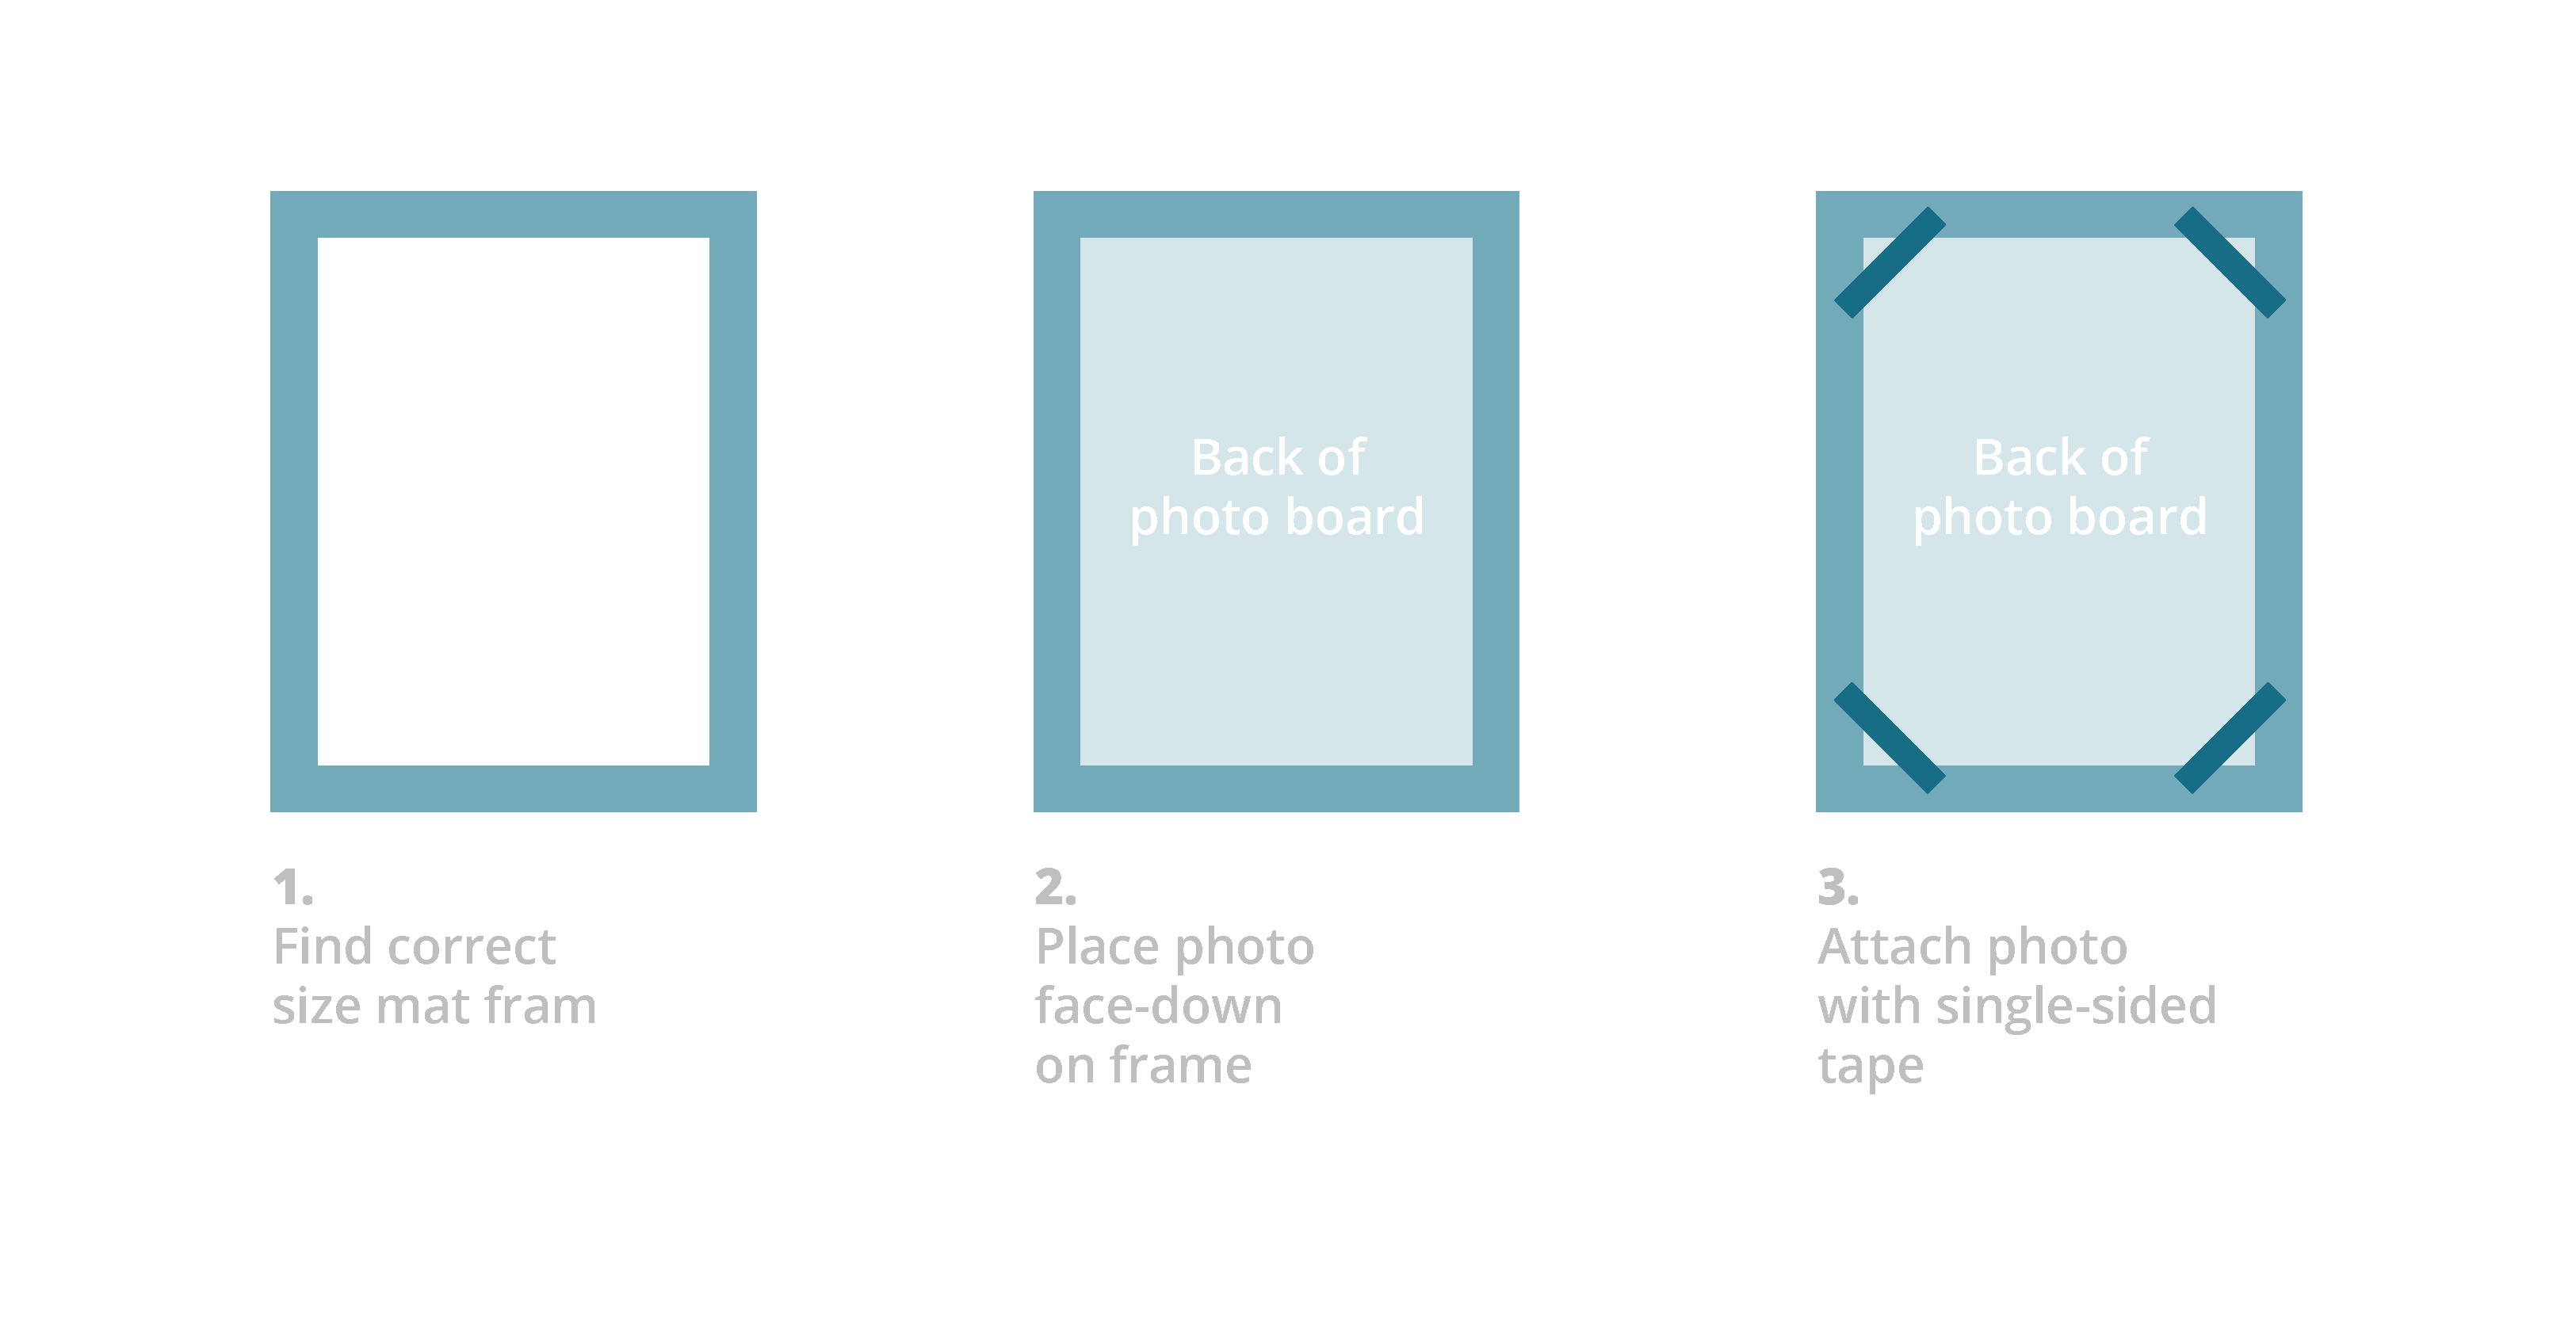
Alternatively, you can buy precut mat frames from most art suppliers in a variety of sizes. The inside edge of the frame you use should be a little smaller than the photograph you’re framing; the outside edge will be a little larger. Then just place the photograph face-down on the frame and tape it in place. (See diagram below.) Note: The extreme edges of the photo will be obscured by the frame if you use this method.
Depending on your wall surface, you can use double-sided foam tape, thumbtacks, or pins to hang the framed artworks. If you’re not able to attach the work directly to the walls, you may be able to string a wire along the wall and hang the images from it with binder clips. Student work can also be displayed on easels, which can be purchased cheaply from art-supply stores. Artwork should be hung roughly at eye level.
Printing Photos:
You might choose to have students print their own photos for the class exhibition, or you might decide to print them yourself or have them professionally printed. You may want to ask a local photography store if they would be willing to print your photos at a discount in exchange for a credit in your exhibition.
You will also have to decide what size prints to make for the exhibition. The size of the prints will depend in part on the photographs’ resolution and file size. We recommend that you print the photographs as large as they can be without becoming pixelated.
We recommend at least 8” x10”. Anything smaller will be too small for display. Larger images are even easier to see and make more of an impression, but, of course, enlargement costs more. You will have to make these decisions based on the resources available to you.
Exhibit labels:
Exhibition text can be computer printed onto nice paper or card stock and attached to the wall in the same way as the photographs. Photo captions can also be printed onto computer labels and either stuck directly onto the wall or applied to another piece of paper or board that is then mounted on the wall. Exhibition text should be printed in a simple font and made large enough so that even the smaller texts—like photo captions—can be easily read from a few feet away.
Photography Resources
Books for Teachers:
Ewald, Wendy, and Alexandra Lightfoot. I Wanna Take Me a Picture: Teaching Photography and Writing to Children. Boston: Beacon Press, 2001.
Freeman, John. Taking Great Photographs: How to Get the Best Picture, Every Time, with Every Camera. London: Southwater, 2000.
Hedgecoe, John. The New Manual of Photography: The Definitive Guide to Photography in Every Format. New York: DK Publishing, 2003.
Kozloff, Max. New York: Capital of Photography. New Haven, CT: Yale University Press, 2002.
London, Barbara, Jim Stone, and John Upton. Photography (9thEdition). Upper Saddle River, NJ: Pearson Prentice Hall, 2008.
Zehr, Howard. The Little Book of Contemplative Photography. Intercourse, PA: Good Books, 2005.
Photography Books for Students:
Bidner, Jenni. The Kids’ Guide to Digital Photography. New York: Lark Books, 2004.
Harvey, Liz, ed. Shoot! Everything You Ever Wanted to Know About 35mm Photography. New York: Amphoto, 1993.
Price, Susanna, and Tim Stephens. Click! Fun with Photography. New York: Sterling Publishing, 1997.
Varriale, Jim. Take a Look Around: Photography Activities for Young People. Brookfield, CT: The Millbrook Press, 1999.
Wilson, Keith. Photography (Hobby Handbooks). New York: Random House, 1994.
Websites, Articles, and Essays:
www.scphoto.com– Student Curriculum in Photography
www.azuswebworks.com/photography/– Focus on Photography
www.betterphoto.fun– Your Online Photography Guide
http://www.icp.org/– The International Center of Photography
http://photo.net/– PHOTONET: A Community of Photographers
http://www.photographytips.com– Tips, tricks, and techniques to improve your photography
https://aperture.org/on-sight/- Teaching Visual Literacy through Photography
http://anseladams.com/- The photography of Ansel Adams
https://www.icp.org/browse/archive/constituents/robert-capa?all/all/all/all/0- The photography of Robert Capa
https://www.archives.gov/education/lessons/hine-photos- The photography of Lewis Hine
https://www.youtube.com/watch?v=F-TyPfYMDK8– THE LAB: DECOY (video)
http://www.huffingtonpost.com/eli-neugeboren/criminalizing-retouching_b_175522.html
Huffington Post: “Criminalizing Retouching”
New York Times: “How to Take Better Pictures”
New York Times: “Pictures, Labels, Perception, and Reality”
http://www.nytimes.com/2009/12/03/fashion/03Boyer.html?pagewanted=all
New York Times: “Point, Shoot, Retouch, and Label?”
http://www.nytimes.com/2010/03/21/weekinreview/21klibanoff.html
New York Times: “What the Still Photo Still Does Best”
https://www.youtube.com/watch?time_continue=8&v=nDD4OKZ_0uU
Documentary about photographer Jay Maisel
https://www.picturecorrect.com
Discussing Identity, Diversity, and Tolerance:
Deconstructing Karl Popper’s Paradox of Intolerance - https://www.politicalanimalmagazine.com/2017/11/22/deconstructing-karl-poppers-paradox-of-intolerance/?fbclid=IwAR20WBucUlsnFTa9XhPVc3_j9XM0V-FaXTVQ9niPTGAZ9j3S-tWBvmE7AE4
New York Times: “Democracy’s Root: Diversity - https://www.nytimes.com/2007/11/11/opinion/11friedman.html
How Identity Politics Changes the Art World
Should Art that Angers Remain on View
Returning to the same Landscape gives Photographers the Chance to Catch Time Itself at Work
How to Take Better Travel Photos, Without a New Camera
Photography Tips and Tutorials